Terra Nova Laser Competition Cuben Fiber Pole Sleeve Cover
Posted: January 31st, 2012 by: h2
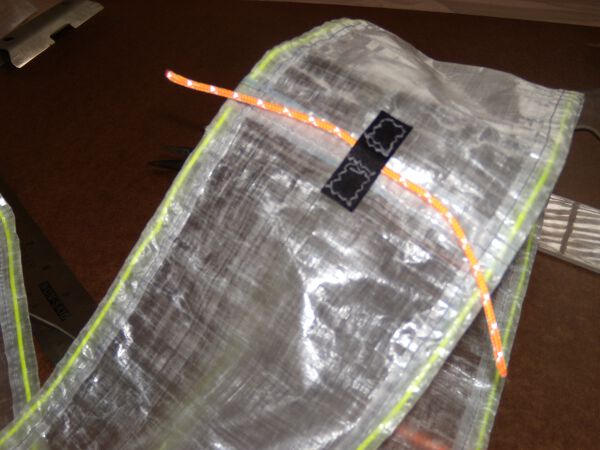
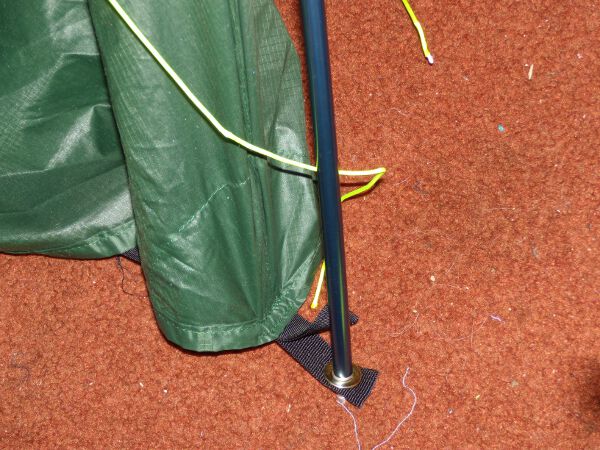
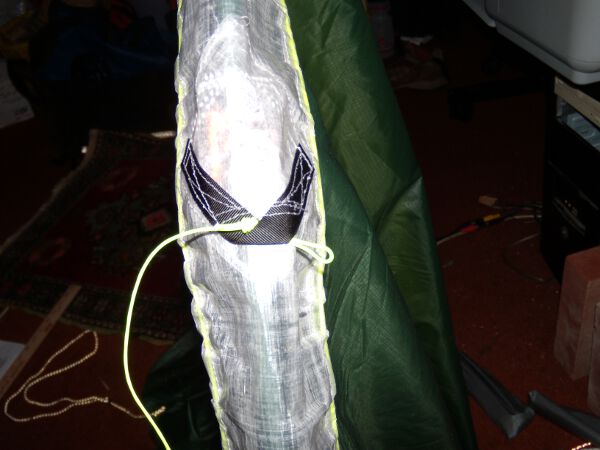
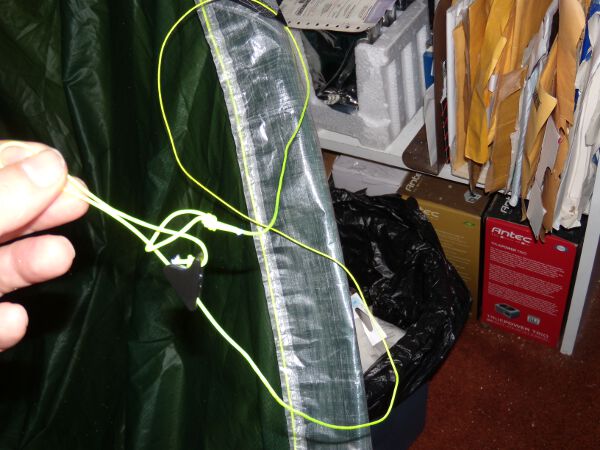
We’ve all done it, gotten our new Terra Nova Laser Competition (available in the USA for much less from www.moontrail.com), opened it up, then scratched our heads wondering what that black thing in the bag is. Here you see a the black thing, covering the center pole.

The black thing is the pole sleeve cover, designed for several purposes: 1. To make it possible to sell a silnylon tent without seam sealer requirements. 2. To strengthen and reinforce the tie-outs that go from pole to ground. 3. To cover the zipper on the fly, and thus avoid having to create a waterproofed zipper or zipper covering.
However, unlike the rest of the Laser Competition, for some inexplicable reason, the pole sleeve cover is not ultralight. In fact, it’s not light at all. The only light part is is the tie out cord and cord lock. The rest is regular coated nylon and 3/16″ nylon cord. All that together weighs in at a fairly hefty 2.7 ounces, give or take.
Since I was looking to do a Cuben Fiber project to get the feel for that new high tech material, I decided that replacing the nylon black pole sleeve cover would be a great first project. Not too hard, but will result in a savings in the end of 1.45 ounces. For a cost of about $12 US for the cuben. I had the other materials lying around, but if you order them, you’ll have to spend a bit more of course, but everything else is really worth having in your toolkit in my opinion anyway.
Why Cuben Fiber?
Besides my wanting to try sewing it? – by the way, most people who deal with cuben recommend using special double sided cuben tape to tape the seams, then sew them, but I decided that wasn’t necessary for this project. First, Cuben Fiber does not stretch or shrink. This makes it a much better choice than Silnylon. Second, it’s totally waterproof, until the mylar sheeting breaks down over time, of course. This also makes it a better choice than silnylon. Third, for the same weight as silnylon, it’s radically stronger, and far more tear resistent. That’s because of the embedded dyneema fibers sandwiched between the mylar like sheets of clear plastic. This weight (1.5oz/yd) of Cuben Fiber is the same weight as 1.4 oz silnylon, but far stronger, and thus makes a good choice for a reinforcing sleeve cover/tie out support.
Materials List
Here is a list of the materials I used for this project, and links to where I got them. All of the sources were from cottage industry suppliers, so these links may not work in the future.
- lawsonequipment.com – Cuben Fiber CT5K.18 1.50oz – Lawson, aka mountainfitter, had a sale on 1.5 oz per yard cuben fiber ($10 US a linear foot), sold by the foot. I got one foot. The rolls, after trimming off the ends without the fiber, are about 54″ long. So that means I got a piece of usable cuben 54″ x 12″. This is enough for the project, and leaves some over for tarp tie-out reinforcement patches. You could also try this with his 0.74 oz / yd cuben, but I don’t recommend it for high stress tasks like this.
If Lawson is out of this cuben fiber, you can email Joe at z-packs and ask him if he will sell you a foot of his 1.5 oz cuben. He has a wider range of cuben fiber, so you could also use the 1.0 oz I think for this project.
- lawsonequipment.com – Reflective Glowire 2mm dyneema core, dacron covered cord. Works with LineLoc 3 Line Adjusters. 1 yard or less should be enough, unless you want to use this for the entire project.
- zpacks.com – 1.25mm and 1.5mm spectra cord To make this is as light as I could, I used 1.25 mm z-line spectra cord for the tie-out cord, 1.5mm spectra for the main length in the pole sleeve cover, then tied about 12″ of the Lawson Glowire cord to the ends to use with the LineLoc 3 Line Adjusters.
- zpacks.com – LineLoc 3 Line Adjusters, Micro Line Loc Guy Line Adjusters Get a lot of these, they don’t cost much each, and you can always use these for other things. I’ll add a Terra Nova mod page in the future, but I recommend picking up at least an 8 pack. You can get these with 1/2 grosgrain loops attached, but you won’t need that for this project. The micro line lock adjustors work for cords that are less than 2mm thick, like the 1.25mm and 1.5mm cords you got.
- zpacks.com – 1/2 inch Grosgrain ribbon Get a few yards of this, you’ll end up using it for other things, and then you’ll have some to spare.
Note: if you want, you can substitute the Micro Line Adjusters for the LineLoc 3 adjustors, and just buy one 50 foot length of zpack cord. It’s not as elegant and easy to adjust that way though. You can also use any other cord that is 2mm or bigger, or use smaller cord and tie them together, as you will see below.
Obviously, you can use materials from anywhere, and in Europe, it might be easier to use a European based supplier for these materials. But I have used and can recommend both z-packs and Lawson outdoor equipment, nice people who do a good job.
Now we’re ready to go.
Equipment Needed to Make the Pole Sleeve
Cuben is quite easy to work with, here’s what you will need.
- Razor blade, sharp. Do not try to cut Cuben with scissors, it’s too tough, and too expensive to ruin that way.
- Wood surface to cut on
- Ruler, ideally steel, to cut against
- Lighter or flame, to seal the cord and grosgrain ends from fraying
- Sewing machine in good working order, capable of sewing between 6 and 8 stitches to the inch, and of sewing slowly.
- Number 10 (70) sewing needles. If you have 9 (65), use those if you can get them threaded. The smaller the better with cuben.
- Good thread, like Gutterman. I found the medium gray blended very nicely with the Cuben semi-clear color.
- Patience
Building the Cuben Fiber Terra Nova Laser Competition Pole Sleeve Cover
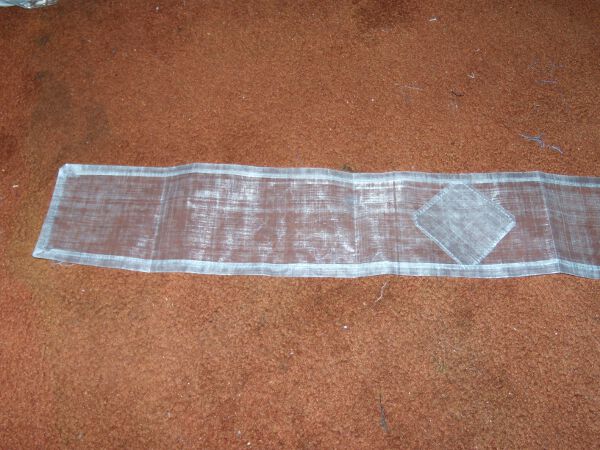
Key Points: I folded over the cuben to form the channels, and sewed on the patches, to the side of the cover that will face DOWN. The 3 cord grosgrain attachments are sewn on this down facing side, and the 2 grosgrain tie out loops are sewn facing up. This leaves as little surface as possible to get wet or leak as you can get. I don’t believe it’s important to seam seal this, but you can seal the patch and grosgrain seams if you want. The two V-shaped tie-outs point to the ends of the sleeve cover, ie, the V points to the end of the tent pole.
To make this easier to follow, I took pictures of the process. The descriptions will be under each picture.
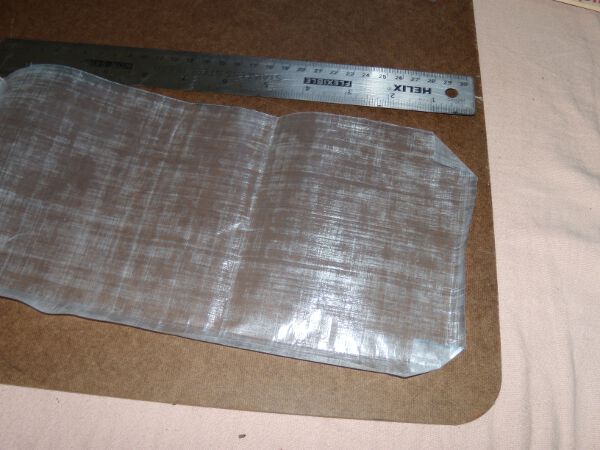
Cut the 1 foot piece of Cuben, after trimming off the clear plastic end pieces, into one piece 12″ x 41″. This will leave you about a 12″x12″ piece to make reinforcements out of for this and future cuben projects. Cut that 12″x41″ piece into two 6″ strips, each 41″ long.
Cuben has a wonderful property which you will really appreciate if you have sewn Silnylon: it keeps its bend when you fold it. This makes this project, which will involve sewing a very long single seam all the way around the borders, much easier than it would otherwise have been.
So, first, we need to join the two pieces to make one continuous piece. Fold each end of one over about 1/2″, and crease sharply, then fit together to make sure you got them to join straight. Fix and redo if you didn’t, if you did, we are ready to sew.
Make sure the two folds are inserted into each other, then pull back on them, and start to sew. We’ll be sewing a box around the edges of the joint, in a single seam.
Run up down one side, then go over, and sew up the other side, and finish the box you’re sewing.

And there it is, almost finished that part.
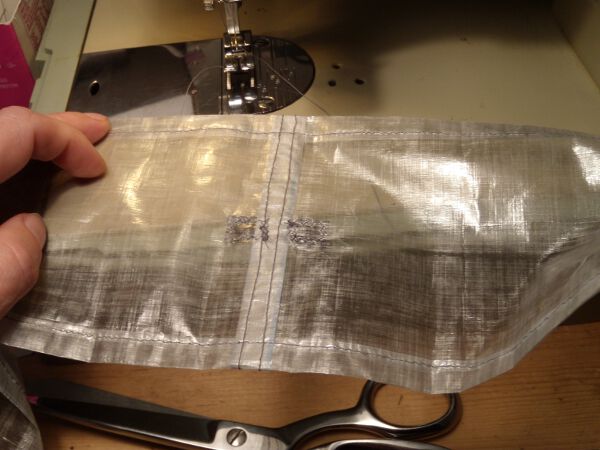
Now the two sides are connected nice and firmly, in a flat felled seam. This should hold up well.
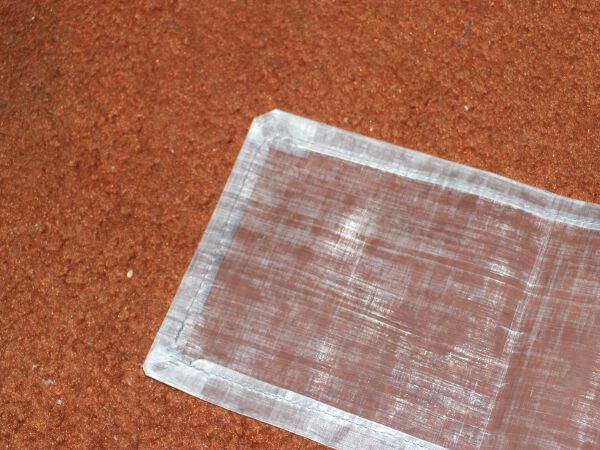
Now, remove the material from the sewing machine, and fold the actual channels the cords will run through, and the top and bottom. Notice that I folded in each corner (1 3/16″) so that I would avoid getting a sharp single corner that might poke a hole in the silnylon of the tent, plus it reinforces the entry points for the cord. Once all four corners are folded over, fold over about 1/2″ each end, the 6″ width part, then create a fold first 1/8″ or a little more that will be doubled under the main channel fold, to keep the edges of that channel nice and clean.
I used a 5/8″ total, or a little more, and measured down the length of each side with a light colored marker so I would make the channel a consistant width the whole way down. So the channel fold is 1/2″, and 1/8″ is folded under that, for a total of 5/8″ inch. This gives just enough channel to get the cord through later, but if you want to make it wider, you can, 3/4″ or 7/8″ should be fine, and will leave you with a width of 6″ – 3/4″ – 3/4″ = 4.5″. I wanted mine as wide as I could get it, but I don’t think it has to be that wide.
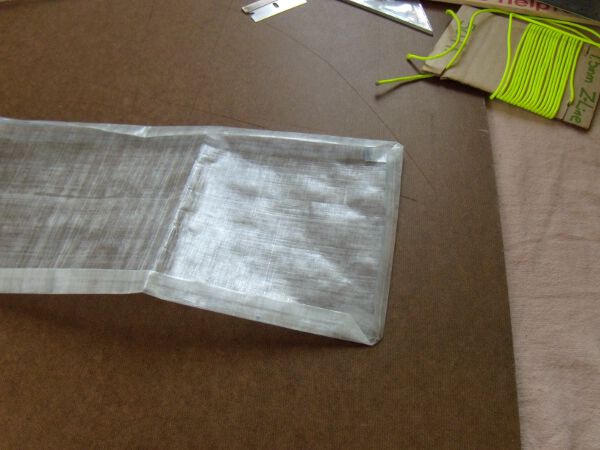
All done folding all the way around. Be patient, and remember, if you misfold, you can redo it, Cuben holds the folds really well, and is quite flexible.
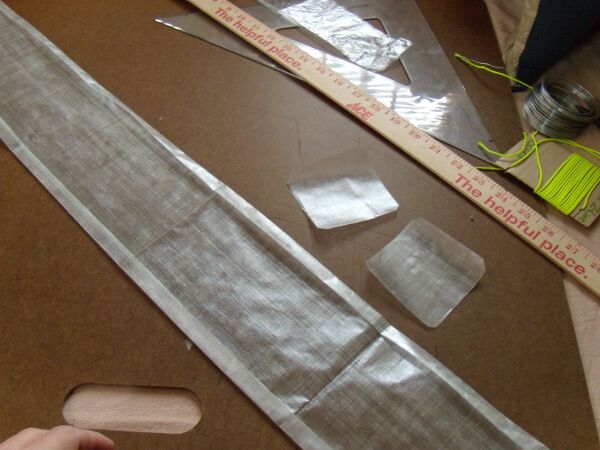
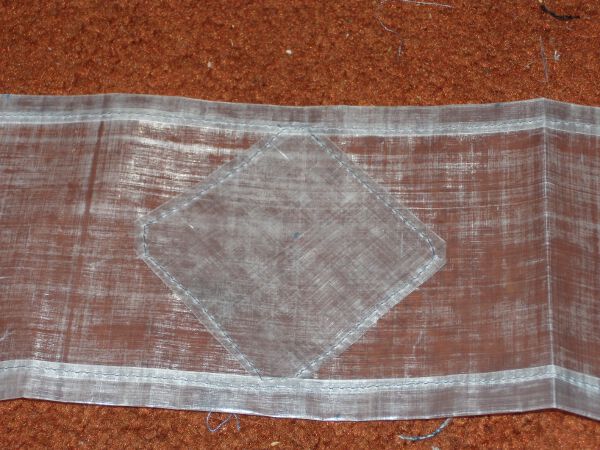
Now cut the reinforcing squares, I found that a square of 3″ on a side is just about right for the channel width I used, I trimmed off about 1/4″ from each corner to get rid of any potential sharp corners, and to get the material out of the actual channel. It should fit right under the 1/8″ folded part, so the stitching will reinforce the reinforcement patches. This is probably not necessary, especially not using the heavier grade 1.5 oz yd Cuben like I used, but if you use really light stuff, like 1.0 oz or .74 oz yd, you might want to do that to make sure.
The squares will go right under the channel edges, like so, and we’ll sew them in first to make sure we get it right. The center of the patch is 24″ from the center of the main strip, in other words, each patch will be centered 24″ from the center of the pole sleeve cover. Make sure to measure and mark to avoid error here.
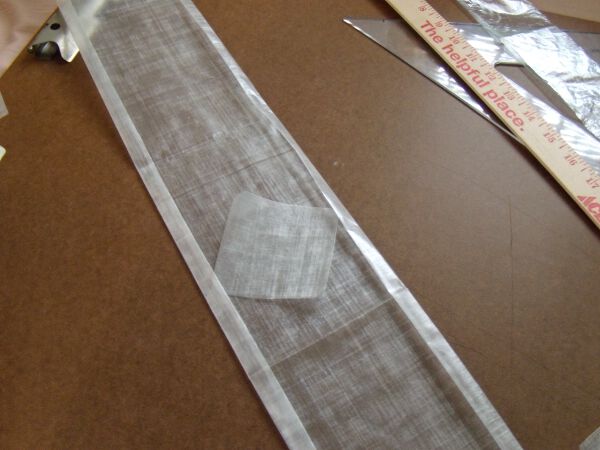
Sewed around the edges of the square, under the channel edges, in a single seam. Remember to lock the stitches by sewing back a few stitches with the reverse button of the sewing machine, and remember to always pull the threads tight before you cut them to get rid of any slack or loops on the other side.

Here’s what it looks like when the stitching is all done all the way around the edges. I sewed starting at the beginning of the end piece that’s folded over, turned the corner, then sewed along the edge of the channel, so that the thread goes through the top piece, the 1/8″ folded under piece, and the main piece under it, leaving the 1/2″ channel open as much as I could. In other words, I sewed as close to the edge of the fold on the channel on the inner side as I could manage. Sew slowly and you will find it fairly easy to do.
There’s a shot of the edges and how the stitching works.
And there’s a shot of the completed reinforcement patch. Notice how it goes under the channel edge.
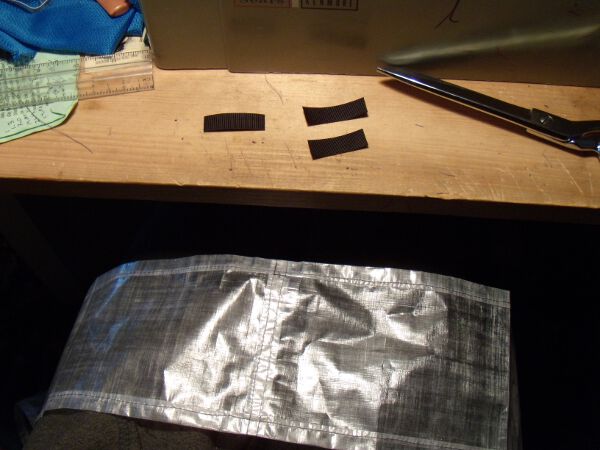
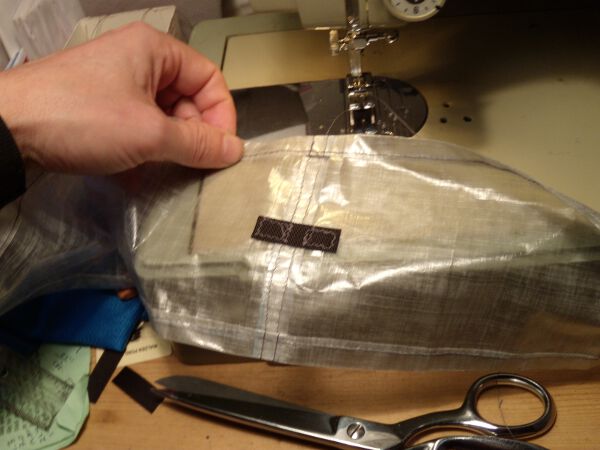
Now cut 3 pieces of about 2″ x 1/2″ grosgrain. Remember to singe the edges to keep it from fraying in the future. We’ll be sewing these to form a small channel for the 3 connector cords that will tie onto the loops of the pole sleeve itself. The center one goes on the center connection, and the two other ones go 24″ down from the center on each side, right in the center of the reinforcement patches. I used a short zig zag stitch because you’re not supposed to bar tack or stitch too tightly on cuben, so the stitches are sort of ugly, if I’d used black thread it would have looked better, so do that if you want a clean look. Notice that I sewed a box using a loose zig zag pattern, leaving about 3/8″ in the center clear for the cord to go under.
That’s how it looks with gray thread, I recommend using black for the grosgrain parts. But lighter thread really lets you see what you are doing, so that’s an advantage. Notice how the grosgrain is stitched on with two loose boxes, with an empty space in the center for the cord to go under.
And that’s what it looks like on the other side.
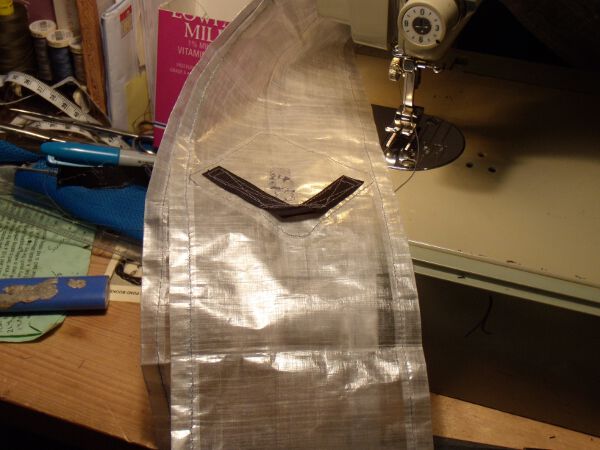
Next, turn over the sleeve cover, so its actual top side faces up, and sew on the two tie-out loops. Those will go inside the stitching that holds on the reinforcement patch cover, by about 3/8″ of an inch or so. I stitched it pretty close on the ends, but I’d recommend leaving it a little bit more open to make inserting the tieout cord easier. I stitched first across the grosgrain on top, by the fold (see below for picture when done), then reinforced it with a box and x on both ends, then 3 rows of stitching on the part closest to where the cord will go. Usually you’d use a bartack, but since this is cuben, that’s not a good idea. You can do this all in one stitch, just go across the top, then down one side, make the box, then make the x inside, then go across another line, and do the other side, then do one last line across, and that’s it.
Remember to make the Vs of these tie outs point to the ends of the sleeve cover, with the open ends pointed towards the center of the sleeve cover.
Now we’re ready to thread the 2 channels. About 100″ is good if you are using thin cord plus thick cord, and about 120″ or so (measure from your existing sleeve pole cords) if you are using just one cord, the 2mm or greater one.
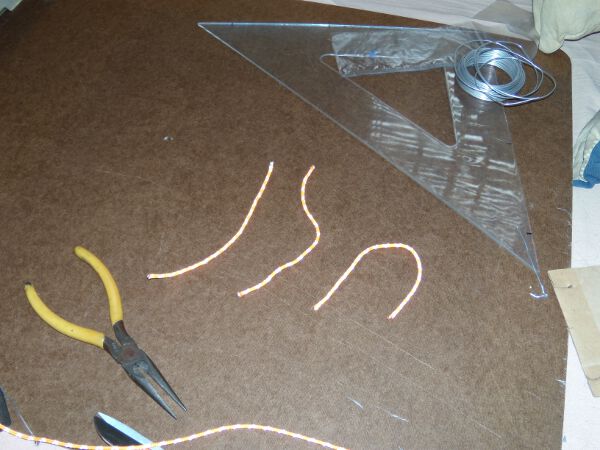
To thread the channels, take a piece of wire, about 6″ to 8″ long, I used aluminum, but any stiff wire will do, and bend the front of it, to get rid of the pointy part that can poke the channel when you push it through, and then bend the back part, and put the cord end in there, then clamp down on it with pliers to lock the cord in. Make sure that the back part, with the cord locked in, has its wire ending bend to point back as well, otherwise it will catch in the channel as you push it through.
To push it through, poke the end without the cord attached into the channel. Hold the end, then pull the channel material up to the front while holding onto the wire end. Then smooth out the channel behind it, pulling in the cord. Be patient, this takes a while, just do a few inches or so at a time, always smooth out behind you as you go along or the channel material bunches up too much.
Here’s how you clamp down on the bend over the cord with pliers.
Done with one side, ready to insert the wire into the second channel.
Just pull the channel material while holding the front of the wire guide, you can also use this technique to thread stuff sack cord channels by the way, but using a shorter wire guide. Here you can see the wire guide almost at the end of the second channel.
And there we are. This is the end I will be connecting the two extension 2mm cords, the yellow channel cord is z-packs 1.5 mm spectra cord, lighter than the 2mm dyneema from Lawson, but that is too thin for LineLoc3 adjusters.
3 pieces of Glowire from Lawson, about 4 or 5 inches long each. These will be put through the 3 channels we made with grosgrain to connect the cover to the tent sleeve.
I made mine a little tight, so I had to poke these through with some wire, but on the good side, the cords don’t slip out now, they are held in nice and snug.
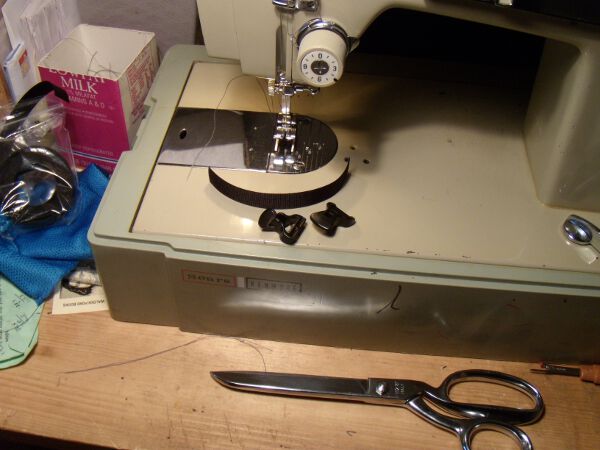
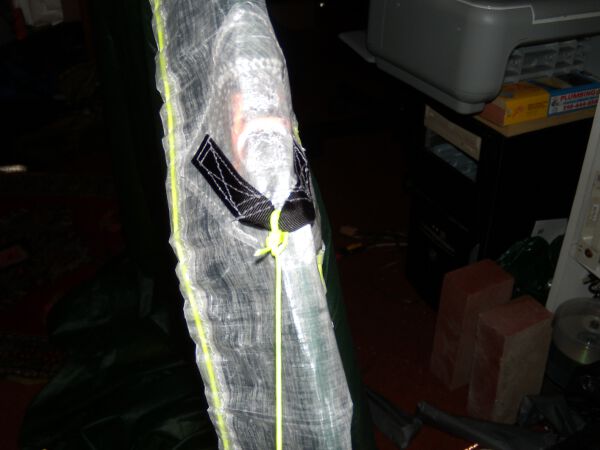
This is the connector for the zipper side of the tent, this will go through the bottom loop where you would have tied on the cords from the sleeve before. Notice a few things here: I took one piece of 1/2″ grosgrain, about 4″ long, and then sewed on the two LineLoc3 adjusters. However, because the ribbon will turn half way, you want to make sure that the two LineLocs are sewn in so each faces the opposite direction of the other.
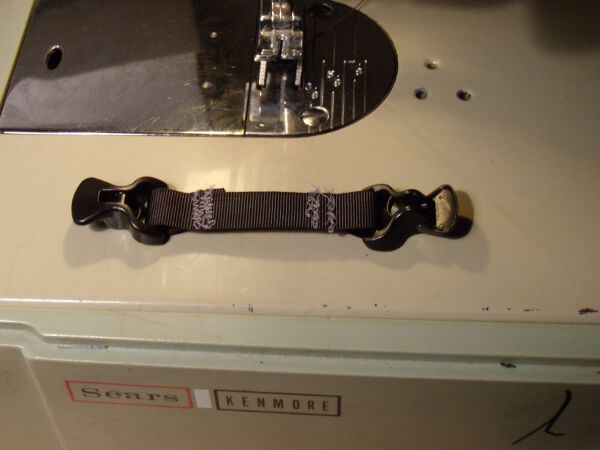
See what I mean? I did a simple bartack here. My machine has been having some problems with tight bartacks, so I made this one loose, but I suggest you do it tightly to make it stronger. Notice how the two LineLoc3s are facing opposite direction?
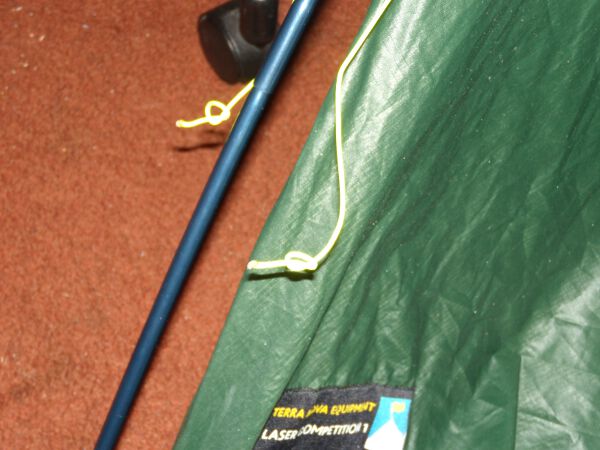
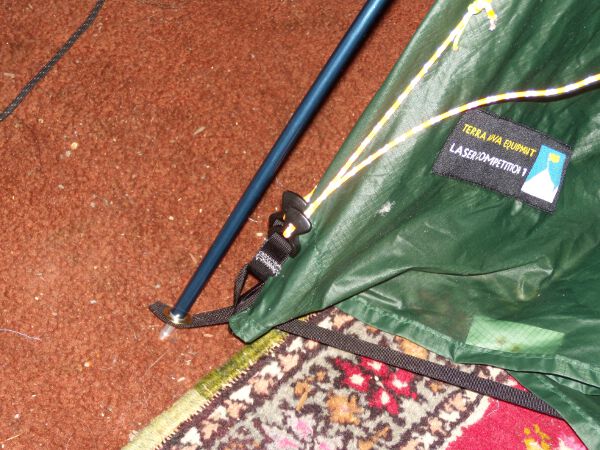
Now we’re ready to put it on the tent. Take the long ends of the sleeve cords ( the part that goes opposite the door that is), and tie them onto the grosgrain loop by the pole attachment. Any loop is fine, as long as it holds. The thinner cords don’t hold knots as well as thicker cords, so keep that in mind.

That’s how the static side should look when you’re done. There’s no need to add LineLocs on this side, the cord and cuben is pretty slick, and it tightens well with them just on the zippered door side.
Tie the first knots to get ready to add the thicker cord extenders, that will actually be used to tighten via the LineLoc3s.
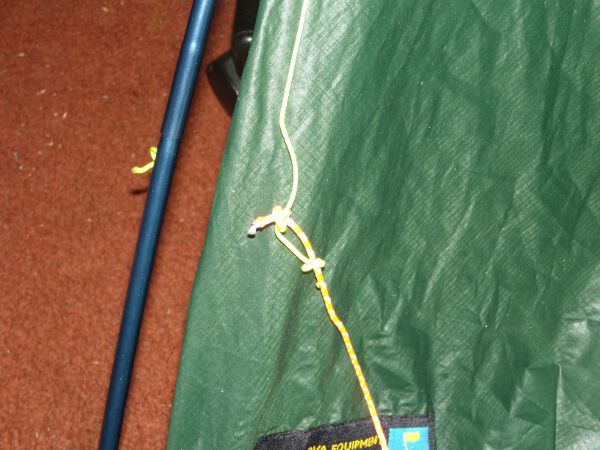
Then connect the thicker cords.
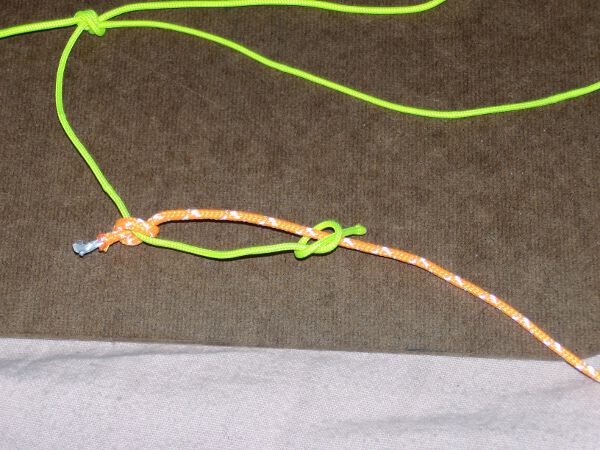
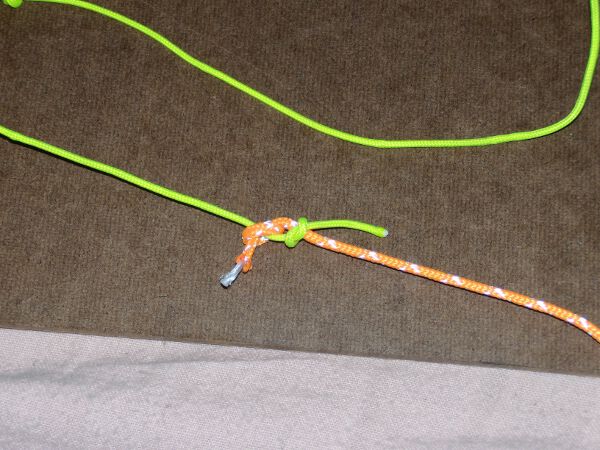
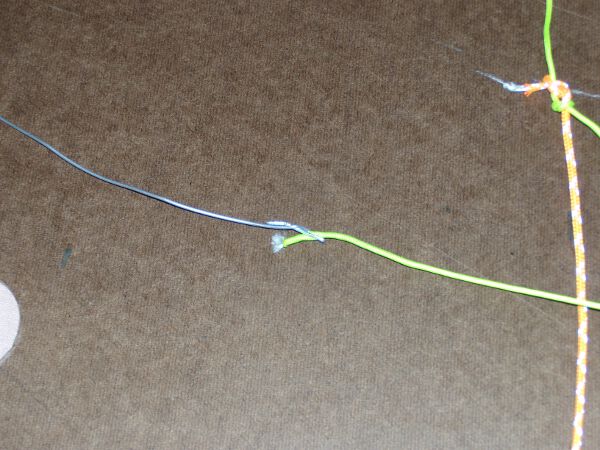
These two pictures show how to make the thinner, lighter cord connect to the thicker, 2mm or greater, cord, that will go into the LineLoc 3 adjuster. If you are using a single heavier cord for the entire length, ignore this.
Pass the LineLoc3/Grossgrain assembly you made above through the zipper side grosgrain loop by the pole grommet.
Then pull the thicker cord through the LineLocs, they are ready to adjust your tension now once you get them both done.
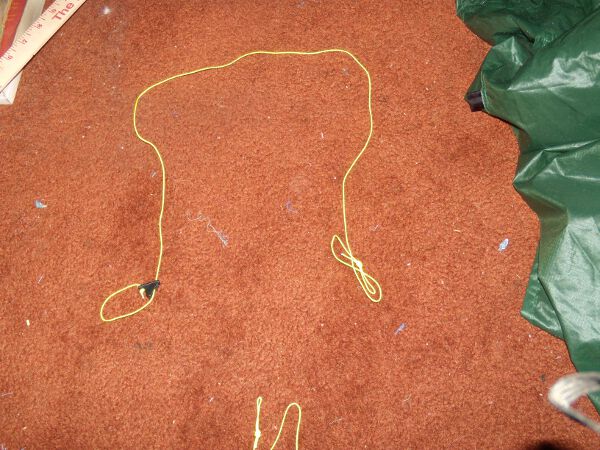
Then take some thin cord, or you can just reuse the cord attached to the original black sleeve cover, with their line adjusters, and tie a loop in one end, about 2 inches long or so. The length of the total should be at least 48″ to start.
Attach the line adjusters to the other end.
Pass the loop in the cord through the tie-out loop, then pull the cord through the loop. This makes it easy to remove it if you want to not have tieouts, or to use it for something else. If you want to always have it attached, then just tie it onto the tieout grosgrain.
Passing the cord loop through itself to lock it down.
Locked down, ready to hold your tent through gales and storms.
Note on Use of Pole Sleeve
I read some comments online that I don’t think are particularly useful in terms of this pole sleeve. First, you don’t need adjusters on both sides with this system, just the zipper/door side is fine. Second, there’s no need to take this off, just leave it connected, it only weighs an ounce or so, less if you use 1 oz / yd Cuben. It’s also not very hard getting the pole in and out with the sleeve on, just be careful when you get to where the knots attach the sleeve cover to the pole sleeve, and make sure they don’t get mixed up with the pole as it pushes through. Also make sure you stick the pole between the two cords on each end of the sleeve cover to avoid tangling it up. That’s also not very hard to get used to.
Once you get the hang of it you’ll see what I mean. The pole sleeve was not a great idea on Terra Nova’s part, but the tent itself is a really good tent aside from this oddity, mine weighs, with everything, including ground cover, about 3oz less than a seam sealed TarpTent Rainbow, and it’s a true double walled tent. Not bad. I like both tents, but in winter, I like double walled tents more. Once I change the end pegging/stake system to be a cleaner 3 stake per end method, with adjustable fly tensioners, the Terra Nova Laser Competition will be good to go.
And That’s That
I’ll put up some pictures of the tent with the sleeve later so you can see what it looks like, but I wasn’t able to pitch it properly during the day I made this tutorial.
This saves you about 1.5 oz give or take, and provides a super strong cuben fiber replacement, with high strength spectra/dyneema cords, fully adjustable. Lighter and stronger and more adjustable, what’s not to like? Plus you got to play with Cuben Fiber.
So, assuming you had most of these pieces of material lying around already, except the cuben, this project cost you around $12 or so, more if you had to order cord and the other pieces, but the cord and the other pieces are really useful to have in general if you’re going to be sewing, so I’d just consider that as building up your parts selection for future projects.
Next up, I’ll show you how to sew in some LineLoc3 adjusters to the main tent tie outs, and how to use only 6 stakes total to pitch the tent (plus two for the sleeve tie-outs if needed). You’ll need some more LineLoc3s, mini line adjusters, a few pieces of 1/2″ grosgrain, and some 2mm or greater cord, and some lighter cord if you want, so I’d just order more than enough when you get the stuff for the above project, then you won’t need to order again. We’ll also replace the tent body elastic tent stake cords and a few other things, which should result in about the same weight on the tent, but with more adjustability, and less weight for stakes.
Now that you have the pole sleeve cover done, let’s make a custom silnylon stuff sack that fits the tent body, pole sleeve, and ground cover, and which weighs about half what the Terra Nova supplied one does (10-12 grams vs 22 grams).