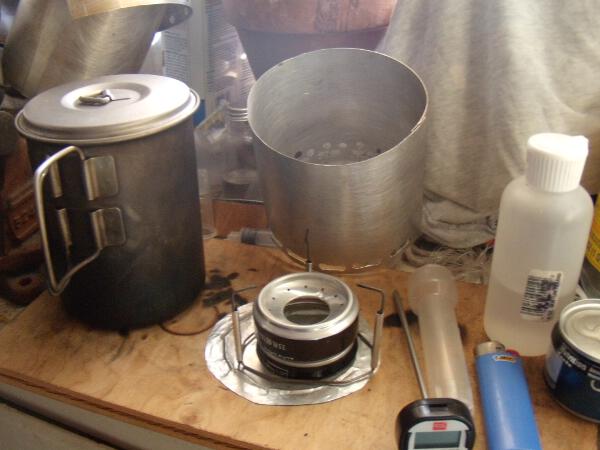
This is the setup I am using for these tests, screen, 2″ pot stand, 1.25″ tall stove, 4″ wind / heat screen, and a 900 ml Snowpeak titanium tall pot. I have also tested on a 600 ml stainless steel pot and that also works, though not quite as well as the ti pot. These are further references you can use to help you create and build the stove/screen/stand:
- Making your own Ion Stove
- Making a Pot Stand
- Reflectix Pot Cozy – coming
- Aluminum Flashing Wind/Heat Screen
- Fuel consumption for canister gas, alcohol, esbit, and white gas backpacking stoves
- Alcohol fuel efficiency for backpacking stoves – ethanol vs methanol
Note, see below for pot stand dimensions for Ion stove, the version linked to above is taller and wider, for a Penny large stove.
Thanks to Sgt. Rock for his Original Ion Designs and Tests
Before I say anything more, I want to thank Sgt Rock, the creator of the Ion stove for his assistance, and for his generosity with his time and knowledge, in finally cracking the .5 oz boil barrier. Everything here is based on his work, including some tips he gave me via email which proved to be absolutely critical, plus a few pointers that might not be totally obvious from his how-tos in terms of how to make the screens and pot stands and stoves.
Stove Design Goals
Here were my design goals as they evolved over some trips using a Mark Jurey Penny Stove, in several versions, with a few heights of wind/heat screens, 5″ to 6″. Because the penny stove has some advantages in terms of speed and wind resistance that the Ion stove may not have, I will do another how to on the penny stove at a later date, but this how to is going to be about how to create a realworld stove that has the following qualities:
- First, and foremost: must boil water using a narrow pot, using no more than 15ml fuel.
- Next, must boil using standard denatured alcohols like SLX, which you can find at any hardware store and even some larger supermarkets. This is also the fuel you are most likely to actually find hiking in the US in trail towns, so making this a requirement makes sense, particularly when sgt rock noted that this is what he achieved his legendary 12ml / 2 cups boil Ion with a .9 liter wide pot, which I will discuss a bit more in the conclusion.
- Stove must be easy to light, and require no priming. The penny stove is not that hard to light once you learn how to do it, but it’s a bit too finicky for my taste, too much priming, and you lose fuel as it flares up, too little, and you have to redo it.
- Screen / heat shield must be easy to use and fit inside of pot without any excessive gymnastics.
- Uses a pot stand. This is a very core requirement, because almost all stoves that require priming and pressurization from the pot set on top of it are not only not super stable, but waste heat while you wait for the stove to heat up. The penny does not have this issue.
- As a sub-requirement, and as an outcome of approaching the 15ml goal, fuel for a week, real cooking, on a real trip, should fit in an 8oz container, ie, small, compact.
- To repeat, must do all this using a narrow pot (ie, a pot that is taller than it is wide), 600ml to 900 ml.
- Must work out of the workshop, ie, outside, in various temperatures. See fuel efficiency thread appendix on altitude and boil times/temps / water temperature.
- Must nullify any claimed weight advantage of using a non renewable cannister stove with higher BTU gas as fuel source.
- Screen must be easy to store in pot, and must allow connecting each end to the other without extra steps or tools. I used to use bolts to hold it together with wing nuts, but it was too finicky for my taste.
- Stand must fold up for storage in the pot without taking up any real room
- Light weight. But that’s a given, it’s going to be light.
Sparing you the suspense, all of these goals are now met. Short version: pick one, efficiency or speed. (However, in a future post, I will give a how-to for the amazing CHS stove, which actually is quite close to the efficiency of the ION, but almost 2x faster to boil).
(more…)