Making a Simple Lightweight Backpacking Alcohol Stove Wind-Heat Screen out of Flashing
Posted: August 15th, 2013 by: h2
This article is part of a related series of fuel/stove articles:
- Making your own Ion Stove
- Making a Pot Stand
- Reflectix Pot Cozy – coming
- Aluminum Flashing Wind/Heat Screen
- Fuel consumption for canister gas, alcohol, esbit, and white gas backpacking stoves
- Alcohol fuel efficiency for backpacking stoves – ethanol vs methanol
One of the keys to efficient boiling/cooking with alcohol stoves is the stove screen/heat shield. There are several components to constructing an efficient stove system, and the most important one is the wind/heat screen.
This screen will work well with Sgt. Rock’s Ion stove or Mark Jurey Penny Stove, or most other types, and should get you close to the maximum efficiency you can get with a flat rolled screen. For other options, see cone type screens and bent in screens (like FlatCat Gear uses). I wanted something a bit simpler than these types of screens however, one that rolls up neatly inside your pot, slots into itself with no weird or unwieldy connector methods.
I have to thank Sgt. Rock, who helped me figure out some of the intricacies of making an efficient stove. His Ion stove / screen / stand system still remains probably the most efficient and simple setup anyone has ever created.
This design is tested fairly extensively and is a little bit different, and more sturdy, than what Sgt Rock has on his site, but the core ideas are the same.
Core Concepts and Goals of Efficient Screens
The ideas behind efficient screens are not that complicated, but some are a bit counter-intuitive.
- Screen should be quite close fitting, about 1/4″ (6mm) from side of pot gap.
- Screen should not be too tall. For most pots, 4″ (10cm) is about right.
- Critical: enough air must enter into burning chamber to allow fuel to not overheat. This is where many screens fail, including most of my earlier attempts, but I did not realize this was the cause. I discovered this by long trial and error, primarily by lifting up fresh, non-holed screens with paper clip legs, then noting that gave me the best efficiency by far of all methods I had tried. Then it was simple math to calculate how many total square inches of air inlet that roughly 1/8″ to 3/16″ (3-4mm) created, then to duplicate that with air holes. The reason you see somewhat jagged airholes on the following completed pictures is that I do not have a punch that creates long air holes, so I formed them by punching out holes, cutting between them with small scissors, then punching a few more pieces off. This creates a few issues with wind, that are however easily resolved.
- The real key: the screen acts much more like a piston cylinder/carburator than a wind screen. The trick is to get the optimal air/fuel mixture, and to create the best burn chamber possible. This was the hardest point for me to understand, and it took a great deal of testing to confirm what sgt rock had told me via email about this question.
Furthermore, based on some touchy and slightly irksome designs I’d used before, I had the following practical goals for this screen design:
- Screen should be made out of aluminum flashing, which is easy to get, and very strong, and can be stored inside the pot easily by rolling it up. This material is springy enough to where it generally opens fine to its desired diameter.
- Screen should have a simple, essentially foolproof method of connecting the two ends. Since I’ve been sewing a lot, a bit of trial and error showed me that a basic flat felled type connection was perfect.
- Screen should not require awkward storage methods, like most cones do, and should above all be as simple as possible, yet yield the most efficient boils possible, on par with something like the Caldera Cone.
After a decent amount of testing, here is a how to on constructing this screen.
Tools and Materials
The tools and materials required are pretty basic.
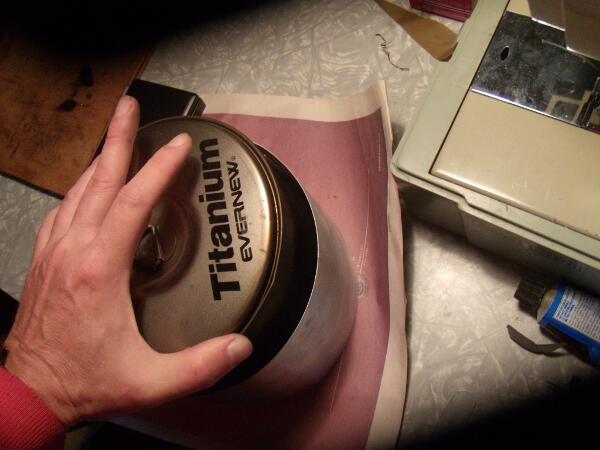
- 4″ Aluminum Flashing. Get to know your local Ace Hardware store, they are great for do it youselfers, you’d be amazed what you can get there. They sell aluminum flashing by the foot in the back of the store, just ask. 1.5 feet should be enough for all pots except really big ones. The screen is going to be made for your specific pot, keep in mind.
- Medium coarse sand paper/emery cloth (emery cloth is better for metal, but sandpaper is fine). Not strictly required, but it’s nice to sand off the plastic coating of the flashing, which turns brown if you leave it on when you use the stove.
- A 1/4″ hole punch, better is an actual 3/8″ punch, but you can make the holes fine with just a regular 1/4″ hole punch.
- Cheap scissors. DO NOT USE SEWING SCISSORS to cut the aluminum. I use two pair, one larger, to cut the actual sheet of flashing, and one smaller to cut between the holes.
- Helpful but not required, a vise. Plyers will work too, and you can also just use a hard surface and bend the aluminum by forcing it against the surface, but it’s easiest to get a clean bend for the joint with a vise.
- 2 scrap pieces of flashing, wide enough to fit the width of the flashing you are using, in this case, 4″ or bigger. These are only needed if you use a vise or big plyers to finish / tighten the fold.
Assuming you have the hole punch, plyers/vise, the total cost of the screen will be under $1 US, for the flashing.
Building the screen
Screen Dimensions
Dimensions: For most pots, you use this simple formula to get the dimensions. Important: make sure you get the true pot diameter, you can do it either by carefully measuring the diameter from the bottom (the top is usually rolled and is wider than the actual diameter). Do not use online sources to get the diameter, it’s very important that you measure it yourself to get it right, since that is going to form one of the most key parts of making your system efficient. Alternately, if you have a flexible sewing type measuring tape, just measure around the pot body and divide by pi, 3.14, to get the pot diameter.
Once you get the diameter, add 1/2 inch ( 1.25cm) to that number, which will allow for the 1/4″ air gap all around the pot.
Here’s some samples:
Snowpeak 900 ml pot: diameter: 3 11/16″, or: 3.6875″
Evernew UL 1.3 Liter pot: diameter: 5 7/8″ or: 5.875
If your math skills are rusty, to get the decimal of the fraction, divide the top number by the bottom number.
Now add 0.5 to that number, let’s say we are making a screen for the Evernew 1.3 liter, which is what the following pictures are showing, so we get:
5.875 + .5 = 6.375
Multiply this by pi, for: 6.375 x 3.14 = 20″, then add 1.5″ for the folded edges, for 21.5″ length total, and we’ll be using the standard width of 4″ since Ace Hardware sells that and it’s pretty much perfect if you use a 2″ pot stand. If your stand is a bit lower, then you want to shorten the screen by however much it is less than 2″, or you can just try it first and see how it works.
Hint: once you cut the flashing, place it around the pot, overlapping one end by 1.5″, the screen should be about 1/4″ away from the pot all the way around. If it isn’t, you’ll have to redo your math and either recut it, or get a new piece if you did it too short.
Constructing the Screen
We are ready to start, since pictures show this better, I’ll use them to explain each step.
I bought more than I needed because I figured I’d be using it for testing and debugging plus making new screens with this design to replace my old ones. I’ve cut off the piece that is 21.5 inches long for the 1.3 L Evernew
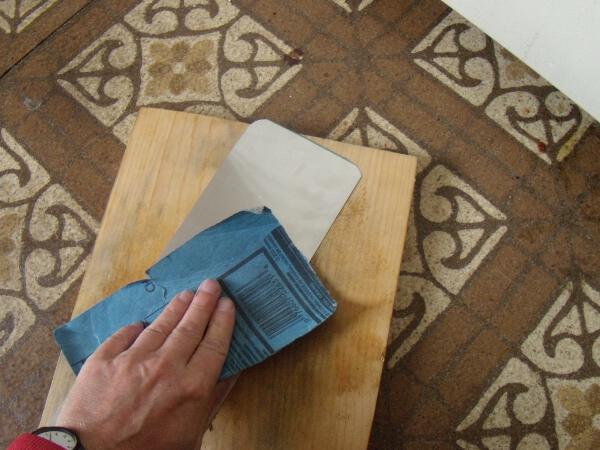
Notice that I slightly rounded the edges of the screen when I cut it out. That is easy to do with scissors, and it’s wise to avoid sharp edges inside backpacks in general. I’m sanding both sides to get rid of the plastic type coating they use on aluminum flashing. It comes off pretty easily with medium grade sandpaper or emery clothe.
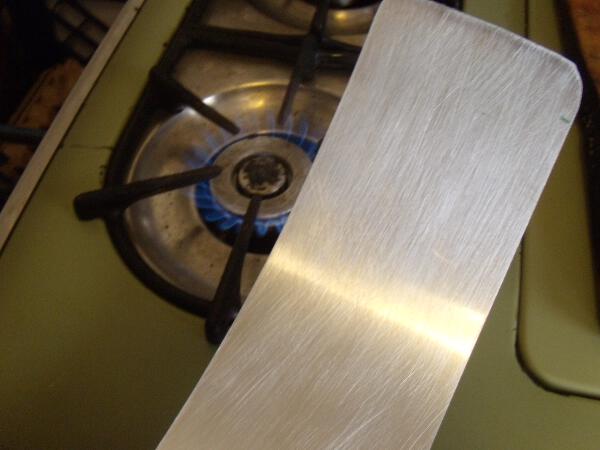
Here I’m burning off whatever is left with a gas stove. If you don’t have a gas stove, you could use a gas burner from your backpacking stove if you have one, or just don’t worry about it, it’s not a big deal, I just do it to avoid that whiff of vaporized plastic you sometimes get on the first uses of the screen.
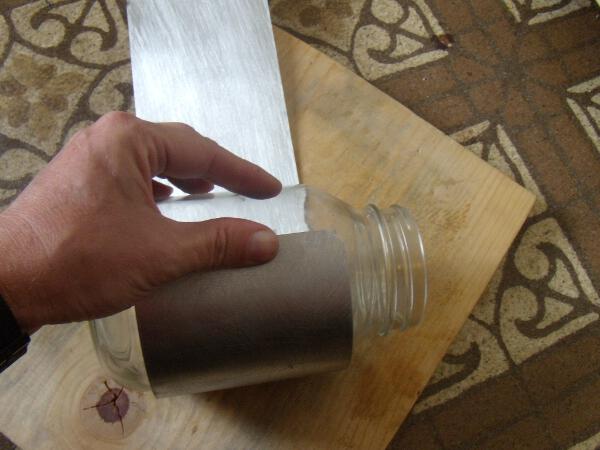
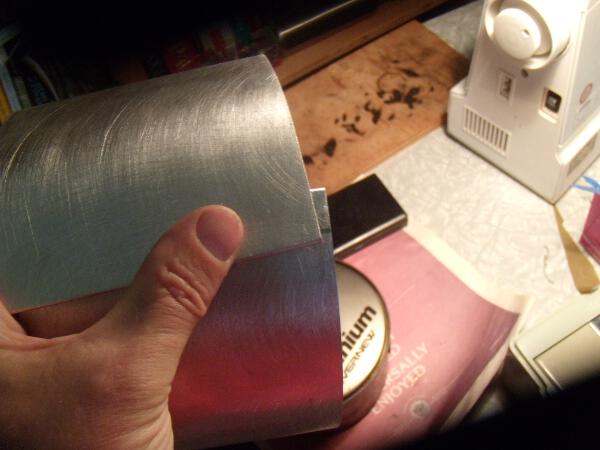
Next, pre-bending the screen, using a large empty jar. Any hard cylinder is fine for this, it should be have a smaller diameter than your pot, but it shouldn’t be too small or the bend is going to be tighter than you want.
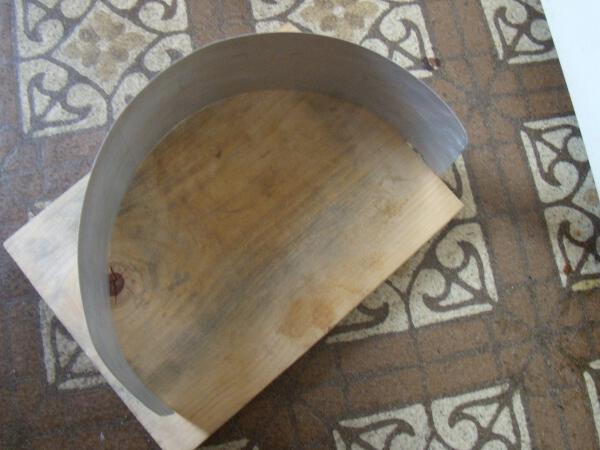
Now it’s got its prebend done, as you can see, the flashing curves nicely, sort of the same idea as a prebent tent pole.

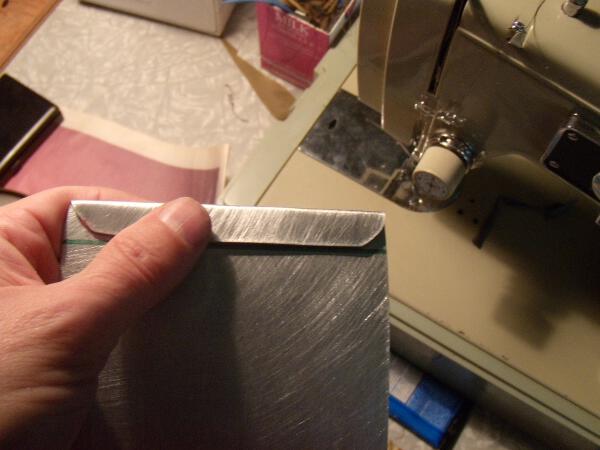
We are ready to bend the slots, mark two parallel lines, one 1/2″ from ends, and one 1″ from the ends. IMPORTANT: make sure to mark the two ends on opposite sides of the flashing, ie, one end on one side, the other on the opposite side, since the two are going to slide into each other.
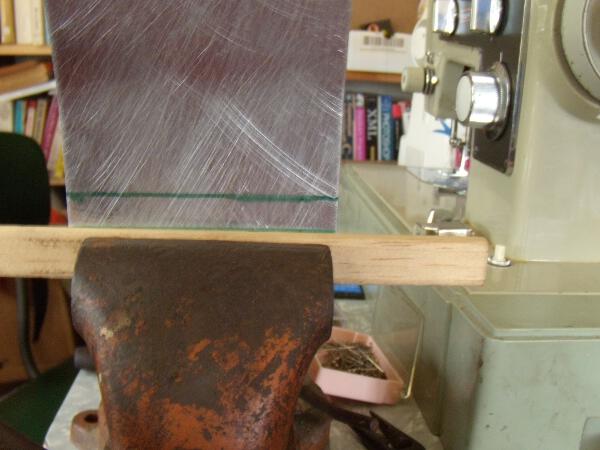
This is where having nice tools really comes in handy. You can carefully do this step with plyers, or by hand by bending against a hard flat surface, and using your fingernails to sort of force the 1/2″ bend, but a vise works better in my experience. Notice I stuck in a thin piece of wood to bend against, but you could use metal too, anything with a 90 degree angled edge to bend over the slot. We’re bending it at 1/2″ line, of course, to form a 1/2″ deep slot.
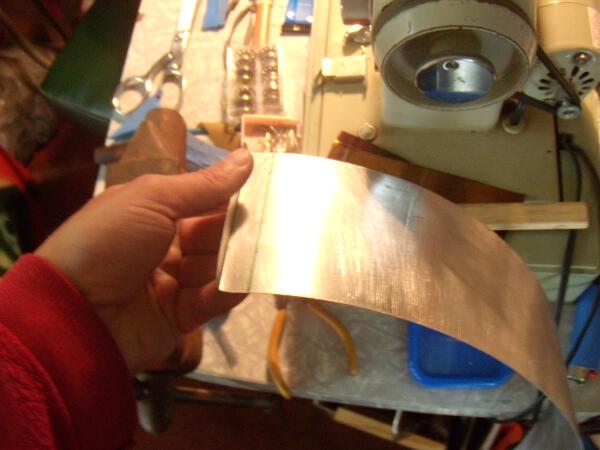
Sorry, I used flash in this picture so there’s glare, but you can see at the left that the edge is now bent 90 degrees, on the other side, it’s bent the opposite direction from this one.
Now that the bend is started and has a good flat edge, you can bend the fold in on itself with your fingers, the stuff bends easily, so don’t worry about it being difficult. You’re just getting the fold flat enough so you can finish it in the next step. Notice the rounded edges?
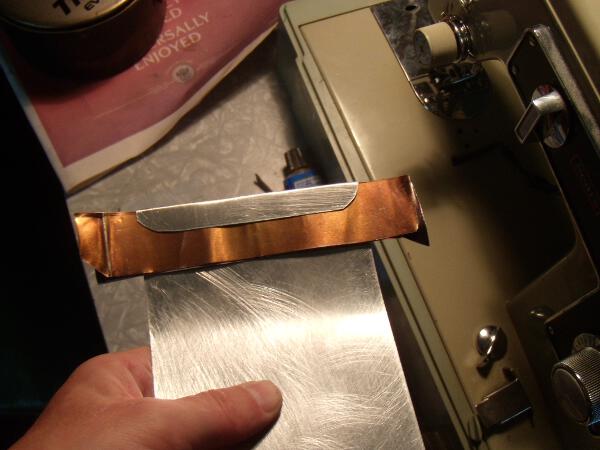
This is where the scrap pieces of flashing come in handy, take two, or double the thickness of the flashing, and insert them into the fold, this will keep the next step from making the slot too narrow, which makes sliding the two ends into each other a pain.
You can also use plyers for this step, but, again, a vise will give you the nicest results, but if you carefully squeeze the fold with plyers it will work ok too, or if you push really hard down on the fold with your thumb on concrete or something else really hard, it will be ok, just not as tight and clean as using a vise.
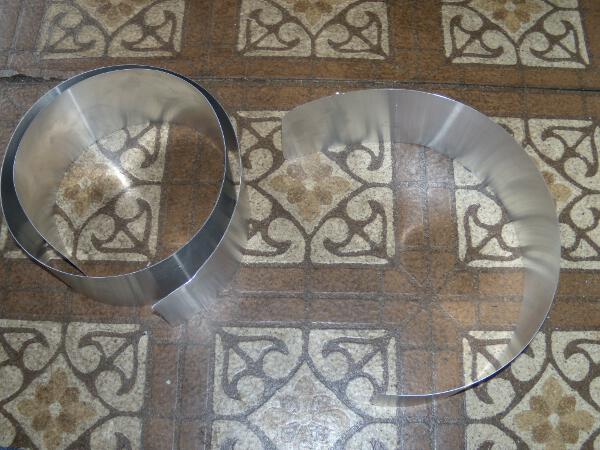
And here we have it, see how the two ends now slot nicely into each other? Hint: if the fold is too tight, which it probably will be, simply take your fingernail and gently pry open slightly the top or bottom of the fold, just enough to make starting the insertion easier.
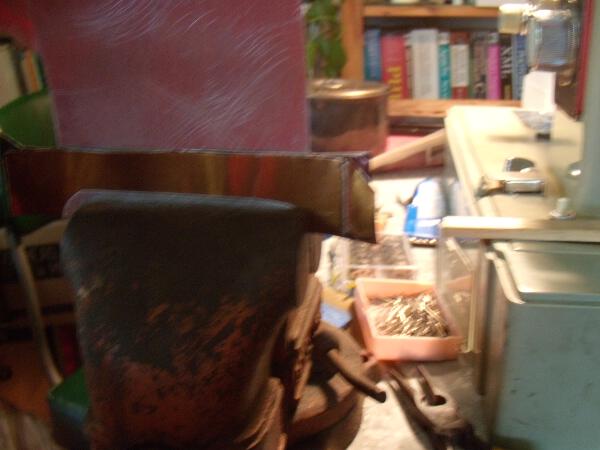
Trying the fit, there should be roughly 1/4″ all around the pot of air space. If there’s not, you made a mistake with your measurements or math, so you’ll have to redo it.
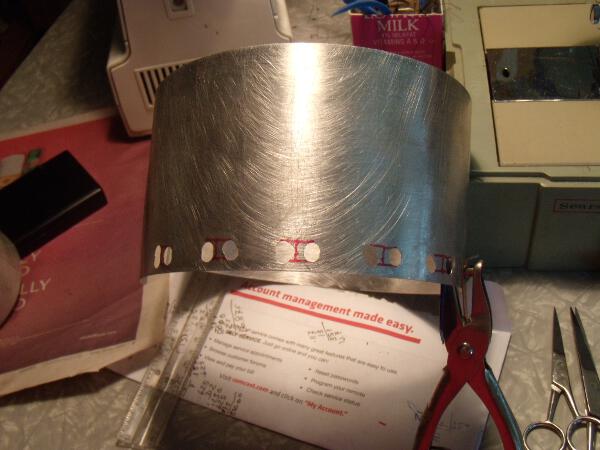
Now we’re going to cut the holes. Figuring out the number of holes is kind of tricky, but I used this basic idea: the screen on a wide pot should provide about 3.5″ of air hole total area. I am creating 3/8″ holes with a 1/4″ punch by punching one slightly above the other. If you have a 3/8″ punch, or a drill with a 3/8″ drill bit, it comes out nicer. I decided to use a 1/4″ hole punch on this one to make the how-to resemble how most people would probably do it. I’m going to connect sets of 2 3/8″ holes to form a roughly 1″ long slot (in other words, the centers of the two holes will be about 3/4″ apart, give or take, which gives for each elongated hole set an area of 3/8 x 3/4, or .375 x .75 = 0.28 sq/in per hole set. Since we’ll make the holes a touch bigger than this, we’ll call it .3 sq/in per hole set, which means we will need about 12 of them, for a total of 24 holes. I measured around the screen to get these reasonably evenly spaced, and in this picture, I actually had the holes spaced a bit too closely together, I think it was 1/2″, that was not enough area of air gap to yield optimal efficiency, which had been determined before punching the holes by lifting the screen up using 4 paper clips, about 1/8 to 3/16″, which gave the optimal efficiency in my tests, prior to punching the holes. Using that total air gap I was able to then figure out how much area the punch holes would have to have. For a narrower pot/screen, maybe use a little less distance between holes in the 2 hole sets.
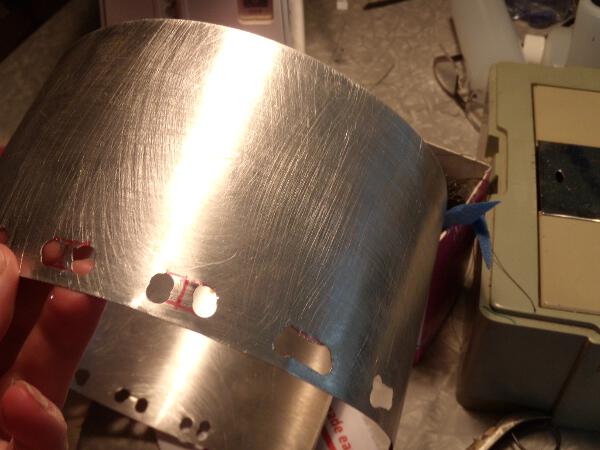
Here you can see the 2 hole sets punched out, and on the right, I have cut out the space between them with small scissors.
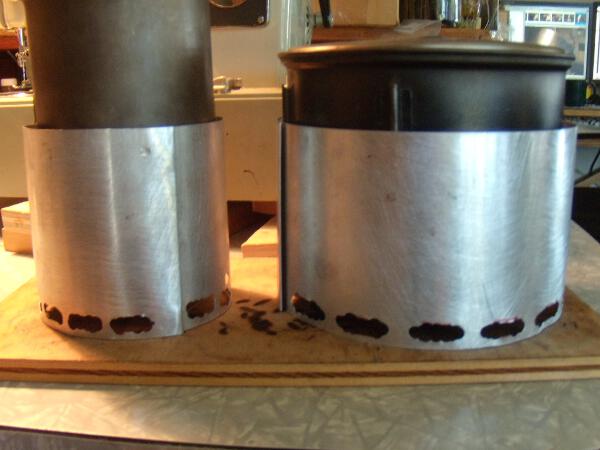
And we’re done!! These are the screens for a 900 ml tall pot, and for the Evernew 1.3 L pot. With a narrow screen, it’s harder to get enough air gap, but I found that, as with the 1.3 liter pot screen, the optimal efficiency was achieved by lifting the screen up with paperclips 1/8 or so inch, so I simply created as much air gap as possible while maintaining screen integrity.
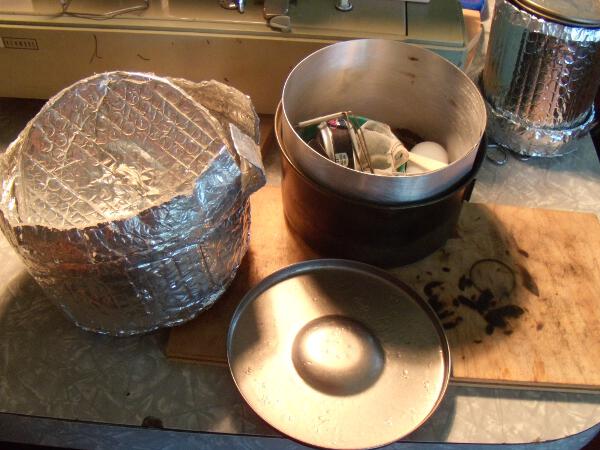
The last step is to cut out a heat reflector, that should be about the same diameter as the completed wind/heat screen. You can use any thick aluminum, the stuff that they use to build oven trays is perfect, very solid. I store this inside the lid for my cozy since it’s the same size roughly, and that way I don’t have to bend it. Using a heat reflector increases efficiency, and also, IMPORTANT, reduces fire risk. Our forests are drying out and fire dangers are increasing in the dry season, so do please use a heat reflector and practice good stove safety whenever you use these stoves. Most pie pans have tiny holes in them, check one by holding it up to the light and see if you can see pin prick sized holes in it, if it has those, don’t use it, the flames/fuel could leak through there and start a fire in worst case situation.
Ready to hit the trail!
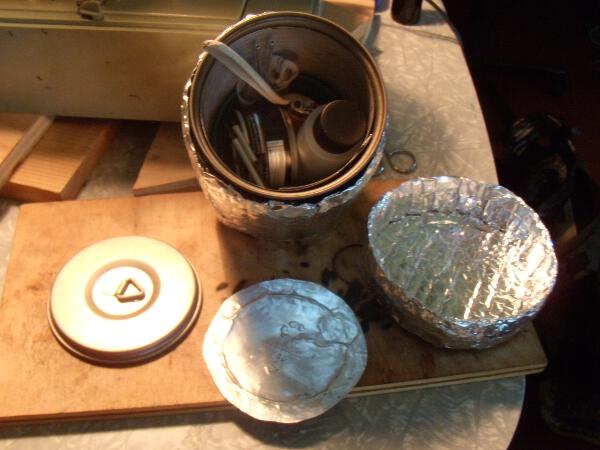
Here’s the completed setups, the 900 ml cookset weight, including screen stove fuel bottle (big enough for 2 days), and heat reflector. This setup weighs about 225 gm total (just under 8 oz), and will consume 1oz of fuel per day if you are just rehydrating using 2 x 2 cups a day of boiled water.
This is the 1.3 liter pot, it weighs about 300 grams (10.5 oz or so) with cozy, screen, pot, lid, stove, stand. Note that the screen is a bit higher than the pot. While you can roll it tighter and get it to fit in the pot the other direction, I don’t like bending these flashing screens that much myself, but you can, you just need to use some elastic to hold it rolled up (hint: they sell cheap pony tail type hair elastic bands in pretty much any drug store, they are durable and light and cheap. But I’d rather just fill the pot with food stuff or whatever and carry it like this. I haven’t gotten around to making the bottom heat reflector for this pot/screen setup because I don’t actually use it normally for backpacking, I use the 900 ml pot.
Note that real lids like these pictures show hold the screen in very nicely if it is taller than the pot, yet another benefit of using real lids, as if you needed more (about 10-15% improvement in boil time/efficiency, for starters according to Cooks Illustrated magazine, a source I tend to trust because they do excellent and quite rigorous testing).
Wind and Your Stove
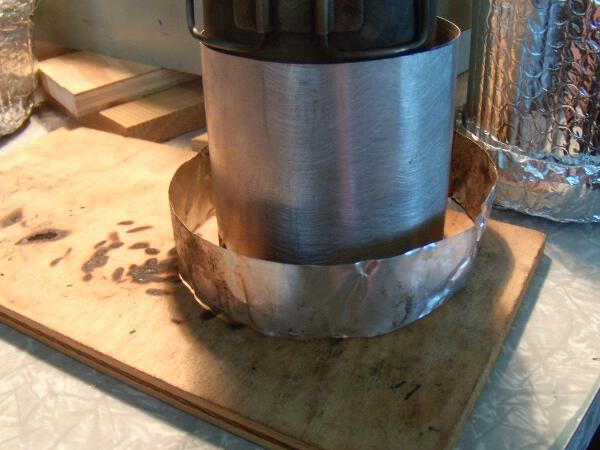
Don’t forget, wind is really bad for stoves, particularly alcohol / esbit types, because the flame is so weak in general. Because this screen requires holes all the way around the base, you might want to also carry a 1.5 inch or so high wind blocker for the bottom holes, this works quite well for light breezes, and restores the stove to about the same efficiency as without any air movement.
However, if you have actual wind, you really want to find a spot without wind movement, you can create a nice wind break using your closed cell foam pad if you carry one, or a jacket propped up on trekking poles, or a tree or boulder.
This is a piece of thick aluminum foil cut out from a stove drip pan, it’s flexible, strong, and can be stored in the pot or the cozy when you don’t need it, and weighs basically nothing.
Wind affects stoves both when blowing over the top air gap and the bottom holes, so with smaller screens like this, you need to get that stove out of the wind. Your tent provides another nice wind break, remember. Some people carry dedicated full scale wind screens made from kite tyvek or mini tarps designed to create a full wind block (like the Jim Wood kite type), but that’s overkill to me, you should be able to repurpose something you are already carrying to do this in most situations, unless you are always finding yourself in very windy areas. Wind reduces stove efficiency massively, just be aware of that, so if there is moving air moving directly over the screen, you are going to see a big increase in boil times, if you can even get a boil.
It’s worth also noting that I used to use a 6″ high screen, with only holes in the non windward direction of the screen, ie, only around a bit less than 1/2 the screen, and performance was equally dismal in the wind, primarily I believe from the turbulence caused as the wind crosses over the top edge of the screen. Basically, the heat/wind screen’s primary purpose is to make the stove burn efficiently, to focus the heat, to shelter the flame, etc, these can tolerate a little bit of moving air, but anything more impacts performance significantly, something I discovered by accident while testing using a big exhaust fan set to slow speed. This is also when I discovered that the bottom second wind screen, the short little one, worked really well to keep moving air out of the stove burning chamber at slow air movement. But a proper shelter from the wind is the best way to do it, either using your tent, or other gear, to actually block the wind up to about 2 feet from the ground, give or take, so no turbulence at all happens around the screen top or bottom.
Conclusion
Note that in terms of storage, the taller pots fit the screen better in general, but they are slightly less efficient overall in terms of fuel consumption, though the difference is very small, about 1ml or per two cup boil I’d estimate unless you get your system as good as sgt rock got his, where he could get a wide pot, 900ml evernew, to boil 2 cups water with 12 ml SLX, which is just downright amazing, I can’t get better than 14 ml with a wide pot, and that is only if using a real lid.
As always with alcohol stoves, please be very careful in terms of fire danger, and if it’s dry season, make sure to clear out the dry material around where you are going to cook very thoroughly, use a heat shield to protect against burning the dry stuff under the stove, and USE A STOVE BASE!! You should never ever burn fuel without a stove base in my opinion, I have created burned dark circles on my testing board many times by not using bases, which means the setup got hot enough to char solid wood, in other words, plenty hot enough to start a forest fire! If your stove does not use a base, I would consider getting rid of it if it does not support adding a base, there can only be so many forest fires started before these kinds of stoves are banned outright, so please do not treat that 1 gram extra a stove base weighs as a negative, it’s not, because it insulates the stove from the ground, that makes the stove burn more efficiently. Some people get really silly about the idea of saving these grams, when it’s actually totally counterproductive in terms of overall efficiency of the system, and safety. So please don’t be part of the problem, these stoves are great, wonders of silence and efficiency, and bring you closer to nature than any other cooking system than wood fires, so don’t blow it for the rest of us please.
Not known for certain: temperature versus air hole area
There’s one thing I have not been able to test, but I believe that for optimal burning efficiency, you might want two screens, one for warm season, one for cold, because I believe you want less air hole area for cold weather, to help keep the burning chamber warmer, this is what I found in testing anyway, but I can’t say for certain, but I would guess you want to drop a wide pot air hole area to about 2.5″ sq or even less. I will do testing in winter, when it gets cold, on this question and update the results if it proves to be different than what I expect.
It might be worth testing yourself, ie, lift the screen before you punch out the holes 1/8″ and see what the optimal efficiency you get is for boiling 2 cups of water, if that gives the best efficiency, then you probably want the max area of air holes in general no matter the temperature, but it is worth checking these assumptions yourself, if you find different than I have, then please let me know.