Making an ultralight priming pan for your alcohol stove
Posted: June 20th, 2012 by: h2
Today I’ll show you how to make an ultralight alcohol stove priming tray for your alcohol stove. Certain types of alcohol backpacking stoves need priming, in this case, I’m using a penny stove that I made a while ago. A fine stove, although hard to make.
A priming tray makes it a lot easier to start these things up, and saves a bit of fuel, but please be careful because you are placing fuel almost directly on the ground, so make sure to clear the spot you are going to use your stove on very thoroughly to avoid fires! The tray also fits snugly under the base when the stove is stored in the pot when packed away.

Today’s project is a companion to the making a (titanium) pot stand article.
Making a priming tray is very easy, and can be done with only a knife or scissors, but you get a cleaner result with some plyers. But you can make one using just your fingers and some way to cut out a rectangle from an aluminum can. I made two, one to carry as a spare since it’s so light it might blow away by accident.
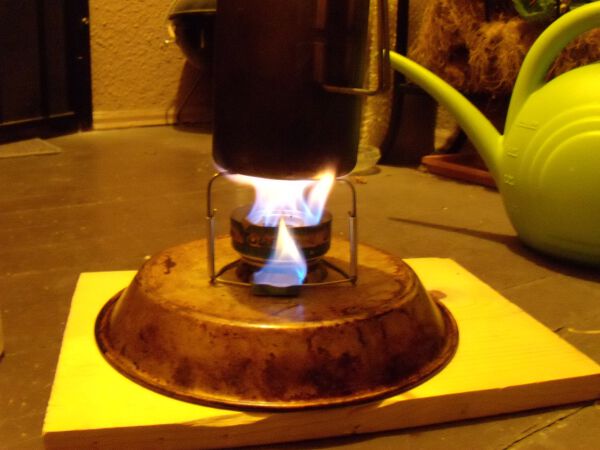
This tray weighs a mighty 0.3 grams. So I made an extra one to keep as a spare. The entire setup (stove, stand, tray) in the above picture weighs exactly 28 grams, ie, just under an ounce. But I do carry a spare priming tray and a spare penny, since penny stoves require pure copper pennies, pre 1982 that is, to work properly, newer ones are too light.
Tools and Materials
This is easy, and you can get the stuff anywhere.
- A rectangle of aluminum from a can, about 1.75 (1 3/4) inch by 1.25 (1 1/4) inch. This holds plenty of alcohol to prime a stove. Don’t use aluminum foil, it’s too flimsy and might start leaking out alcohol on the ground after a while.
- Scissors to cut this rectangle. Or a knife, if you are going ultralight and have no scissors.
- Plyers. I used two kinds, regular flat ended and needle nose, but you don’t need that unless you have them lying around, which of course any self-respecting do it yourselfer should.
That’s it, I told you this would be a basic project.
How to Make the Priming Tray
Here’s the steps, in pictures, to make the tray. Explanations follow each picture.

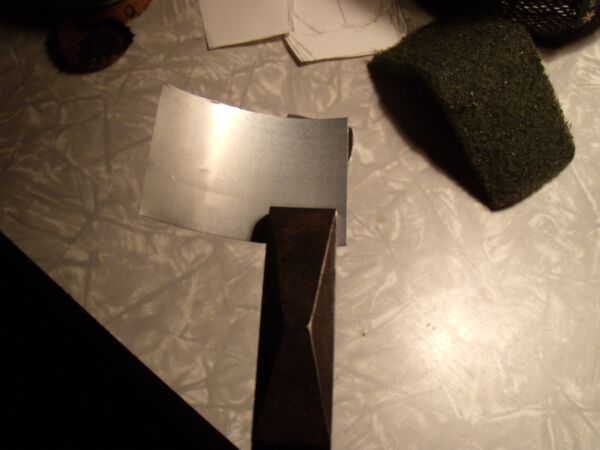
There’s the penny stove, with base, and the old priming tray, which was a bottle cap bent up slightly. Fairly heavy, and prone to rusting out. There’s the rectangle of aluminum from a can, plus a priming tray to its right, already done.

This is how we’ll get a nice clean bend on each edge. I made the priming tray about 3/8″ high (9mm), that holds plenty of alcohol to get the stove started fast.

There’s the first side bent in.

And the second. Notice I did the long edges first.

Now I’m bending the short edge. This is where having a slightly wide tipped set of plyers comes in handy, but you can do this with your fingers or smaller plyers too, the edge just won’t come out as clean.

Now all the sides are bent in, you can see the corners flared out, flatten those in the next step so they point out, then we’ll fold those points in, sort of like an origami project.

Take the plyers and grab the corner sections, that are sort of rounded out, and bend them flat, to get them ready to fold in, to finish the box shape.

There’s the 4 edges bent up, note how the corners point up. This is why the alcohol doesn’t spill out, it’s a sealed little box.

Flattening the points onto the short side.

After flattenging the points and making the box sides, you might find that the bottom got sort of bowed out, you can flatten that back using anything, the tip of the wide plyers fit perfectly.

There’s the tray set in front of the heat shield/wind screen. Normally I’d have that set inside, like the top picture shows, but you can see it better this way. For home tests, I have this on a wood porch so I use an upside down pie tin on a board to avoid burning the paint on the porch, in case you’re wondering.

And there it goes! Success! Note however how the flames sort of touch the ground, so please please be aware of this fact and make sure to always check the stove spot for hot spots and embers and any other fire hazard, this is no joke, people have literally burned down big parts of national forests and parks being careless with their stoves.

There’s a shot without the windscreen, as you can see, the flames really are big. I’m also using a bit of priming alcohol on the top of the stove in this test, but I think you can get away with using very little on the top section, heating it from the bottom works a lot better and is a lot faster and more reliable.

There’s the stove in full blast, you should do some trials to see how little priming alcohol you can get away with using, but the advantage with a penny type stove is that the pot gets all the priming heat, so you really don’t lose much fuel when priming, unlike say a cat can stove, like a superkat, which has to be fully burning before you put the pot ontop of it. This is another reason I prefer pot stand using stoves, by the way.
And that’s it, you’re all done. Wasn’t that easy? Why buy this stuff when it’s so easy and affordable to do yourself. Plus you made it!