Making an ultralight titanium pot stand for your alcohol stove

May 6th, 2012 by h2

Today’s project is pretty easy. This is actually the second stand I made, the first was done in a similar manner, but used some old stainless steel bicycle spokes I had lying around. This project is a companion to how to make an alcohol stove priming tray article.
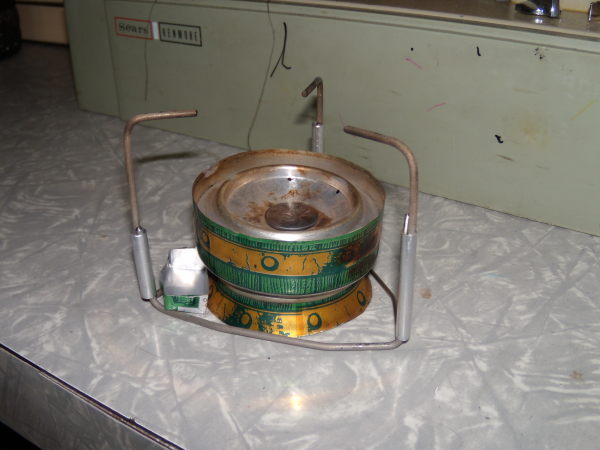
This stand when done will weigh 12,5 grams. The stove weighs about 15.5 grams. With thinner titanium, it would weigh a bit less. And yes, this stuff really works. The stove, stand, priming tray, and penny, weigh in at exactly 28 grams, just under an ounce that is. I carry an extra priming tray and penny, plus of course the windshield and pot and all that.

My entire solo cook set weighs in currently at about 10oz, that’s stove, stand, pot, pot cozy, 2oz alcohol fuel bottle, some condiments/containers and teas, and a spoon. For longer trips, I’d bring a soda bottle for more alcohol, carry that outside the pack of course.

When built in this way, the stand will support pretty much any pot made, from smallest to biggest, within reason of course. 2 liters at least anyway.

Stand Materials and Tools

  • The main component, some type of metal rod. You can get stainless steel bicycle spokes at most local bike shops. 15 gauge are fine, but make sure they are straight gauge, not the more normal 15/17. 16 gauge are also probably strong enough I’d say, and will be lighter, but are harder to find. You can usually buy these singly from quality bike shops. The steel they use in stainless bike spokes is very strong and hard to bend/cut.

    For this project, however, a member of backpackinglight.com was nice enough to sell me some spare titanium rod he had available. Since selling the raw material isn’t his main thing (he sells his own pot stands, Zia, using a different design and method for construction) you’ll have to find your own sources if you want to use titanium.

    The rods I used were 0.10 and 0.06 inch in diameter. I used the thicker for the two parts that actually hold up the pot, and the thinner for the connector piece that completes the triangle.

    After seeing how the materials handled, I think a 0.08″ titanium rod would do quite well for all the legs, and would be solid enough for most pots.

  • Two thicknesses of aluminum tubing. I got these from the hobby metals rack at Ace Hardware stores. Always support Ace Hardware, and other locally run and owned hardware stores please, plus Home Depot has zero clue about what you are talking about if you ask them for something like this. I took the rods I was going to use and selected the tubing inner diameter to get as close a fit as possible. Sometimes you may have to slightly flatten the tube to get both rods inserted, depends on the diameter of the rods. In my case, the 7/32″ (stock number 105) and 5/32″ (stock number 103) were perfect fits for two diameters of .1″ and .1 + .06″ respectively.

That’s it for the materials. Titanium is way easier to bend and cut than stainless steel bike spokes, by the way. I used a heavy set of pliers, a vice, and a hack saw to cut the thicker rod ends. plus a file to smooth off the cut ends.

Titanium also has a real positive side affect, aside from being sort of neat and hip, it cools almost instantly, making those burned fingers I’d get from touching the stainless steel pot stand a thing of the past. Steel holds the heat a lot longer. These things get hot by the way, very hot, red hot at times. To me that’s the real advantage of using titanium rod over stainless steel bike spokes.

I also made a template which you’ll see below that had all the key measurements on it to avoid error.
Read the rest of this entry »
How to Sew a Silnylon Stuff Sack for Terra Nova Laser Competition

February 4th, 2012 by h2

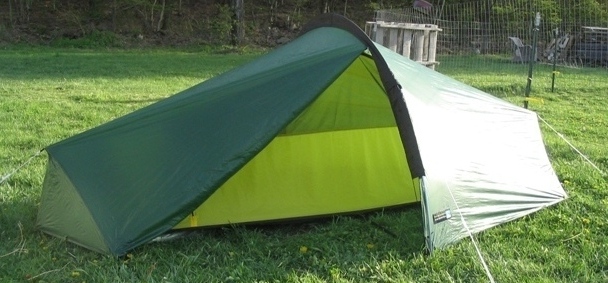
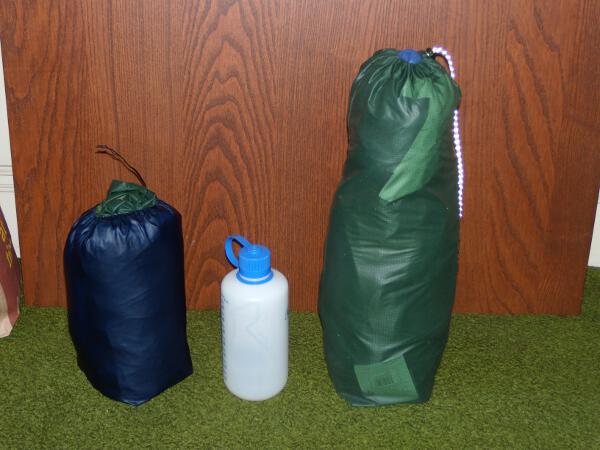
The following is a photo how-to on sewing a silnylon stuff sack. In this project, we’ll be making the blue stuff sack, which will replace the hugely oversized original green one.

The dimensions here will be for the Terra Nova Laser Competition tent, but just change to suite your needs for any other stuff sack, there’s nothing specific at all about this to that tent except the dimensions.

Making a New Stuff Sack for your Laser Competition

So you’ve got your new Laser Competition tent. Now it’s time to change a few things. First, let’s get rid of that big stuff sack, which is much bigger and heavier than it needs to be (about 22 grams, compared to the 10 to 12 grams this stuff sack will weigh. Since Terra Nova supplies a tent pole bag and stake bag, I put the stake, or nail, bag, into the pole bag, then stick both into a side backpack pocket. Then we’ll create a small stuff sack that fits the tent, a light ground cover, plus the attached cuben fiber pole sleeve cover I showed you how to make, and which takes a lot less room in your pack, and weighs less as well. The final dimensions of this bag will be about 5.5″ X 10.5″. If you want it a bit roomier, just add one inch to the height of the bag.

Important: Remember to either remove or fold in half the two carbon fiber end poles when using a smaller stuff sack!! They are easy to reinsert, and if you just fold them in half, and leave them in, that’s even easier. But do it however you like, just don’t try to fold the tent up to stick in this stuff sack with them at standard length.

You can see the huge difference in size in the above picture, the new stuff sack is half the volume of the original Laser Competition stuff sack. That’s a 1 liter/quart Nalgene water bottle for size comparison.

I’ve also sewn pole and stake/peg/nail sacks, which weigh either less or the same as the Terra Nova supplied ones, except they have drawcords, like this bag. The only differences between those and this one, aside from the dimensions, are that they have a single side seam, and no squared off bottom, ie., they are a simple envelope shape, but the rest of the sewing process is exactly the same as given here.

Basics of Stuff Sack Construction

This style is the basic method, and doesn’t use a sewn in rounded bottom, so you have to add in the folds you’ll sew in on the bottom of the bag to square it off when figuring out your dimensions.

Remember: circumference is equal to diameter desired X 3.14 (pi), plus 1 1/8″ for the seam allowance.

Height is about the desired height of the final bag, plus 1/2 the diameter for the bottom, and about 1/2 the diameter for the top. Remember that the channel requires about 1.5″ inches extra material on the top.

Sewing is in several stages: 1. top right and left corner diagonals created to form channel reinforcement and entry points. 2. Channel itself is sewn, with tucked under 1/4″ to create a clean edge and avoid loose edges that can fray. 3. First seam, that creates the tube, done with bag turned inside out. 4. Second seam, which is pinned with bag turned back to normal, as a flat felled seam, then the bag is reversed, inside out again, so you can sew it from the inside. 5. Stitch along bottom edge. 6. Fold over this edge, and sew through it again to reinforce it. 7. Sew two corners, with bag inside out, to form a sort of square on the bottom when it’s full.

The last step is to thread cord into channel, and then add cord lock.

Materials

  • Quest Outfitters – Silnylon Seconds 1.1 oz / yd silnylon. Note, that they don’t include the silicone weight, so the real weight is around 1.4 oz/yd. The quality of the silnylon doesn’t matter a lot here, and the cheaper stuff actually tends to be a bit lighter. Seconds are also fine for such projects, and they are cheaper.

    For this project, we’ll use a piece 14.5″ X 18.25″

  • ZPacks 80 pound polyester cord I like the 80 pound cord, it’s totally adequate for most stuff sacks, and is really light. By the way, get a lot of this, I always order too little, and am always running out, 5 or 10 yards should keep all your stuff sacks happy.
  • Zpacks Tiny Cord Locks Same for the Tiny Cord Locks, they work great with these narrow cords, and don’t weigh anything. Tiny is a size, smaller than the Mini, which is way too big for very thin cord. Order a bunch of these, you’ll probably want to replace most of your drawcords with this and the 80 pound cord once you see how light it is.

I use Gutterman thread, which is easy to find, but any quality polyester thread should be fine. But Gutterman is well regarded and reliable, the thin kind for this project, and most silnylon and light fabric projects.

When sewing silnylon, use the smallest needle you can manage, I used a #10 (70) needle. And sew slowly, otherwise the material tends to slip out of control, resulting in either really tiny stitches, or simply losing control of the seam altogether.

You should also have very sharp scissors. A good piece of advice I got was to use one pair only for fabric, not paper or other stuff, ie, have a dedicated, very sharp pair of scissors for your sewing. You can sharpen real steel scissors if you are careful using a honing rod if you have one, for knife sharpening, just make sure you are at the right angle to the actual cutting edge, which is quite steep, not like a knife.

Sewing the Stuff Sack

Ok, we’re ready to go now.

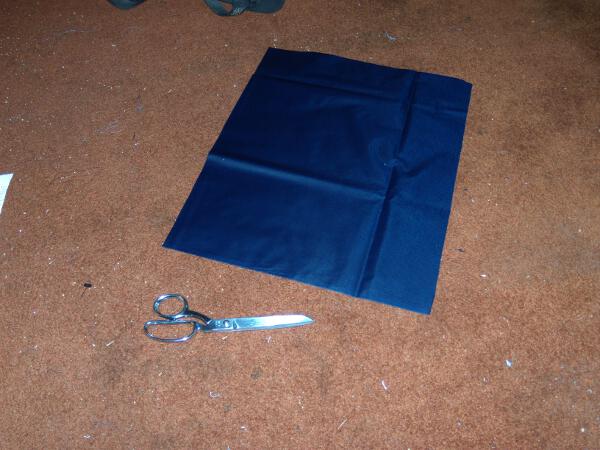
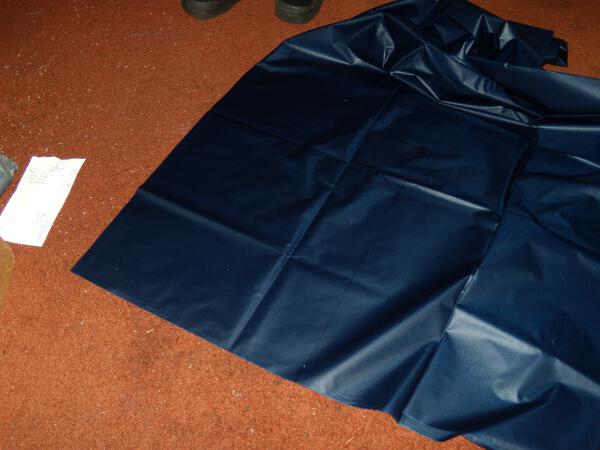
To get the right size, I’ll measure then cut a rectangle of silnylon, 14 1/2″ by 18 1/4″.

There is the rectangle, cut out and ready to be sewn.
Read the rest of this entry »

Terra Nova Laser Competition Cuben Fiber Pole Sleeve Cover

January 31st, 2012 by h2

We’ve all done it, gotten our new Terra Nova Laser Competition (available in the USA for much less from www.moontrail.com), opened it up, then scratched our heads wondering what that black thing in the bag is. Here you see a the black thing, covering the center pole.

The black thing is the pole sleeve cover, designed for several purposes: 1. To make it possible to sell a silnylon tent without seam sealer requirements. 2. To strengthen and reinforce the tie-outs that go from pole to ground. 3. To cover the zipper on the fly, and thus avoid having to create a waterproofed zipper or zipper covering.

However, unlike the rest of the Laser Competition, for some inexplicable reason, the pole sleeve cover is not ultralight. In fact, it’s not light at all. The only light part is is the tie out cord and cord lock. The rest is regular coated nylon and 3/16″ nylon cord. All that together weighs in at a fairly hefty 2.7 ounces, give or take.

Since I was looking to do a Cuben Fiber project to get the feel for that new high tech material, I decided that replacing the nylon black pole sleeve cover would be a great first project. Not too hard, but will result in a savings in the end of 1.45 ounces. For a cost of about $12 US for the cuben. I had the other materials lying around, but if you order them, you’ll have to spend a bit more of course, but everything else is really worth having in your toolkit in my opinion anyway.

Why Cuben Fiber?

Besides my wanting to try sewing it? – by the way, most people who deal with cuben recommend using special double sided cuben tape to tape the seams, then sew them, but I decided that wasn’t necessary for this project. First, Cuben Fiber does not stretch or shrink. This makes it a much better choice than Silnylon. Second, it’s totally waterproof, until the mylar sheeting breaks down over time, of course. This also makes it a better choice than silnylon. Third, for the same weight as silnylon, it’s radically stronger, and far more tear resistent. That’s because of the embedded dyneema fibers sandwiched between the mylar like sheets of clear plastic. This weight (1.5oz/yd) of Cuben Fiber is the same weight as 1.4 oz silnylon, but far stronger, and thus makes a good choice for a reinforcing sleeve cover/tie out support.

Materials List

Here is a list of the materials I used for this project, and links to where I got them. All of the sources were from cottage industry suppliers, so these links may not work in the future.

  • lawsonequipment.com – Cuben Fiber CT5K.18 1.50oz – Lawson, aka mountainfitter, had a sale on 1.5 oz per yard cuben fiber ($10 US a linear foot), sold by the foot. I got one foot. The rolls, after trimming off the ends without the fiber, are about 54″ long. So that means I got a piece of usable cuben 54″ x 12″. This is enough for the project, and leaves some over for tarp tie-out reinforcement patches. You could also try this with his 0.74 oz / yd cuben, but I don’t recommend it for high stress tasks like this.

    If Lawson is out of this cuben fiber, you can email Joe at z-packs and ask him if he will sell you a foot of his 1.5 oz cuben. He has a wider range of cuben fiber, so you could also use the 1.0 oz I think for this project.

  • lawsonequipment.com – Reflective Glowire 2mm dyneema core, dacron covered cord. Works with LineLoc 3 Line Adjusters. 1 yard or less should be enough, unless you want to use this for the entire project.
  • zpacks.com – 1.25mm and 1.5mm spectra cord To make this is as light as I could, I used 1.25 mm z-line spectra cord for the tie-out cord, 1.5mm spectra for the main length in the pole sleeve cover, then tied about 12″ of the Lawson Glowire cord to the ends to use with the LineLoc 3 Line Adjusters.
  • zpacks.com – LineLoc 3 Line Adjusters, Micro Line Loc Guy Line Adjusters Get a lot of these, they don’t cost much each, and you can always use these for other things. I’ll add a Terra Nova mod page in the future, but I recommend picking up at least an 8 pack. You can get these with 1/2 grosgrain loops attached, but you won’t need that for this project. The micro line lock adjustors work for cords that are less than 2mm thick, like the 1.25mm and 1.5mm cords you got.
  • zpacks.com – 1/2 inch Grosgrain ribbon Get a few yards of this, you’ll end up using it for other things, and then you’ll have some to spare.

Note: if you want, you can substitute the Micro Line Adjusters for the LineLoc 3 adjustors, and just buy one 50 foot length of zpack cord. It’s not as elegant and easy to adjust that way though. You can also use any other cord that is 2mm or bigger, or use smaller cord and tie them together, as you will see below.

Obviously, you can use materials from anywhere, and in Europe, it might be easier to use a European based supplier for these materials. But I have used and can recommend both z-packs and Lawson outdoor equipment, nice people who do a good job.

Now we’re ready to go.

Equipment Needed to Make the Pole Sleeve

Cuben is quite easy to work with, here’s what you will need.

  • Razor blade, sharp. Do not try to cut Cuben with scissors, it’s too tough, and too expensive to ruin that way.
  • Wood surface to cut on
  • Ruler, ideally steel, to cut against
  • Lighter or flame, to seal the cord and grosgrain ends from fraying
  • Sewing machine in good working order, capable of sewing between 6 and 8 stitches to the inch, and of sewing slowly.
  • Number 10 (70) sewing needles. If you have 9 (65), use those if you can get them threaded. The smaller the better with cuben.
  • Good thread, like Gutterman. I found the medium gray blended very nicely with the Cuben semi-clear color.
  • Patience

Building the Cuben Fiber Terra Nova Laser Competition Pole Sleeve Cover

Key Points: I folded over the cuben to form the channels, and sewed on the patches, to the side of the cover that will face DOWN. The 3 cord grosgrain attachments are sewn on this down facing side, and the 2 grosgrain tie out loops are sewn facing up. This leaves as little surface as possible to get wet or leak as you can get. I don’t believe it’s important to seam seal this, but you can seal the patch and grosgrain seams if you want. The two V-shaped tie-outs point to the ends of the sleeve cover, ie, the V points to the end of the tent pole.

To make this easier to follow, I took pictures of the process. The descriptions will be under each picture.

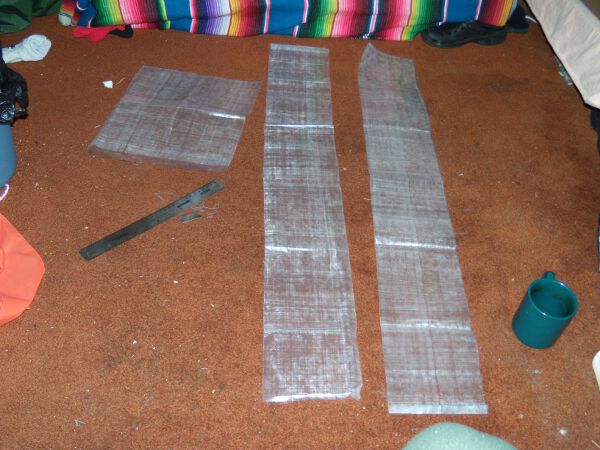
Cut the 1 foot piece of Cuben, after trimming off the clear plastic end pieces, into one piece 12″ x 41″. This will leave you about a 12″x12″ piece to make reinforcements out of for this and future cuben projects. Cut that 12″x41″ piece into two 6″ strips, each 41″ long.
Read the rest of this entry »

Stories Of Our World

April 21st, 2011 by h2

I have collected a variety of links and don’t really have anything to do with them, so I’ll just post them and let you figure it out.

All of them are in some way or other related to the state of our world now, no future fantasies are required to see the rapidly approaching future world.

A Critical View of Nuclear Energy and Radiation

March 31st, 2011 by h2

As pro-nuclear energy spin and PR damage control go into high gear as Fukushima continues to unravel and expose the type of lies and deceptions that have misled even well intentioned commentators, like George Monbiot, into accepting the negatives of nuclear energy for some (deluded) idea that it is a lesser of evils (this concept is itself a notion created by the nuclear spin industry, I am virtually certain) certain parts of this project become increasingly well defined. The thing I find most revealing is the notion, put forward by pro-nuclear apologists, innocently, or less so, that normal people are suffering from an irrational fear of radiation.

These types of falsehoods and misrepresentations of what is actually going on form the essence of all modern public relations, especially for heavy industrial consumers of non-renewables of all types, constitute a steady chipping away at a very accurate human response towards radiation, one that I would suggest is in fact highly rational. It is especially discouraging to find such things repeated by those who might otherwise pride themselves on being somewhat critical in their view of modern society.

What I find totally and utterly irrational is that when faced with the total inability to handle a process that was never meant to exist on earth, people continue to pretend that it’s a rational decision to create it. This is simply false. It was a refusal to start winding down power consumption, coupled with a military requirement to obtain nuclear materials for nuclear weapons, that was directly responsible for humanity entering this lunatic course of action in the first place.

The entire nuclear project has always been totally irrational, on so many levels it’s really hard to pick just a few, but here’s some: assumption, despite ALL history as positive proof against this faith, that societies will. continue to be able to handle these toxic systems as they change in fundamental ways. Poster child for this? Ukraine, today, requiring about 2 billion euros to create a new sarcophagus for Chernobyl.
Read the rest of this entry »